Learn how to build your own solar generator with this straightforward step-by-step guide.
Key takeaways:
- Consider energy requirements, location, budget, storage capacity, and skill level
- Calculate power needs for devices and include buffer for inefficiencies
- Components needed: solar panels, charge controller, battery, inverter, cables, mounting hardware
- Step-by-step guide: select container, install battery, attach charge controller and inverter, set up solar panels, test system
- Benefits of DIY solar generator: cost-effectiveness, practical skills, adaptability, sustainability, sense of accomplishment
What To Consider BEFORE Building A DIY Solar Generator
Before embarking on the construction of a solar generator, it’s essential to evaluate several factors that will determine the project’s success and practicality.
One crucial aspect is understanding the energy requirements of the devices you intend to power. This involves documenting their wattage and the duration of use to accumulate a total energy consumption figure. It is this figure that will dictate the size and capacity of your solar generator.
Additionally, consideration must be given to the environment where the generator will operate. Different geographic locations receive varying amounts of sunlight, which directly affects solar power production. Ensure your location receives sufficient daily sunlight to justify the investment in a solar setup.
Another key factor is budget constraints, as DIY solar projects can vary greatly in cost. The cost is influenced by the components selected and the energy needs. High-quality components may require a larger upfront investment but can offer superior performance and longevity.
Storage capacity is also a crucial parameter. The battery, or battery bank, must be capacious enough to store the generated energy to cater to power needs during sunless periods. This implies a balance between capacity, physical size, and cost.
Lastly, the technical skill level needed to assemble a solar generator should not be underestimated. While many resources and kits are available, a basic understanding of electrical systems and safety procedures is necessary to avoid hazards and ensure a functional end product.
By carefully considering these points, you’ll set a solid foundation for your DIY solar generator project, leading to a more efficient and tailored outcome.
Calculate Your Energy Needs
Determining your power requirements is a crucial first step in constructing a solar generator; it dictates the size and capacity of your system. Start by listing all the devices you plan to power and note their wattage. This information is typically found on the device’s label or in its user manual.
Once you have your list, calculate the total wattage needed by adding up the individual wattages. Consider the duration as well—how many hours per day will you run each device? Multiply the total wattage by the hours of use to get the total watt-hours per day.
Keep in mind that some devices have higher starting power requirements than their running power. For such devices, use their starting wattage in your calculations.
Include a buffer in your total energy requirement to accommodate for inefficiencies and potential additional power needs. A 20-25% excess is commonly recommended. This will ensure your DIY solar generator can handle unexpected increases in energy demand.
Understanding your energy needs allows you to select the appropriate solar panels and battery storage capacity, ensuring that your DIY solar generator is both efficient and effective for your intended use.
Parts You Need to Build Your Homemade Solar Generator
To construct a reliable solar generator, you’ll need a handful of key components:
Solar panels: The primary energy source, solar panels capture sunlight and convert it into electrical power. Opt for high-efficiency panels to maximize energy generation.
Charge controller: This device regulates the electrical current flowing from the solar panels to the battery, preventing overcharging and damage.
Deep-cycle battery: A storage unit for the electricity generated by your solar panels. Choose a battery with enough capacity to meet your power requirements—a lead-acid or a lithium-ion battery are common choices.
Inverter: This transforms the DC electricity stored in the battery into AC power, which is necessary for running most household devices and appliances.
Cables and connectors: Ensure you have the correct cables for connecting the solar panels, charge controller, battery, and inverter. Quality connectors will ensure safe energy flow and system longevity.
Mounting hardware: Necessary for installing the solar panels securely on your roof, in your yard, or on your vehicle, depending on where you’ll be using the generator.
Each component plays a crucial role in the overall function of your solar generator. Selecting quality parts and matching them correctly to your energy demand will result in a more efficient and reliable system.
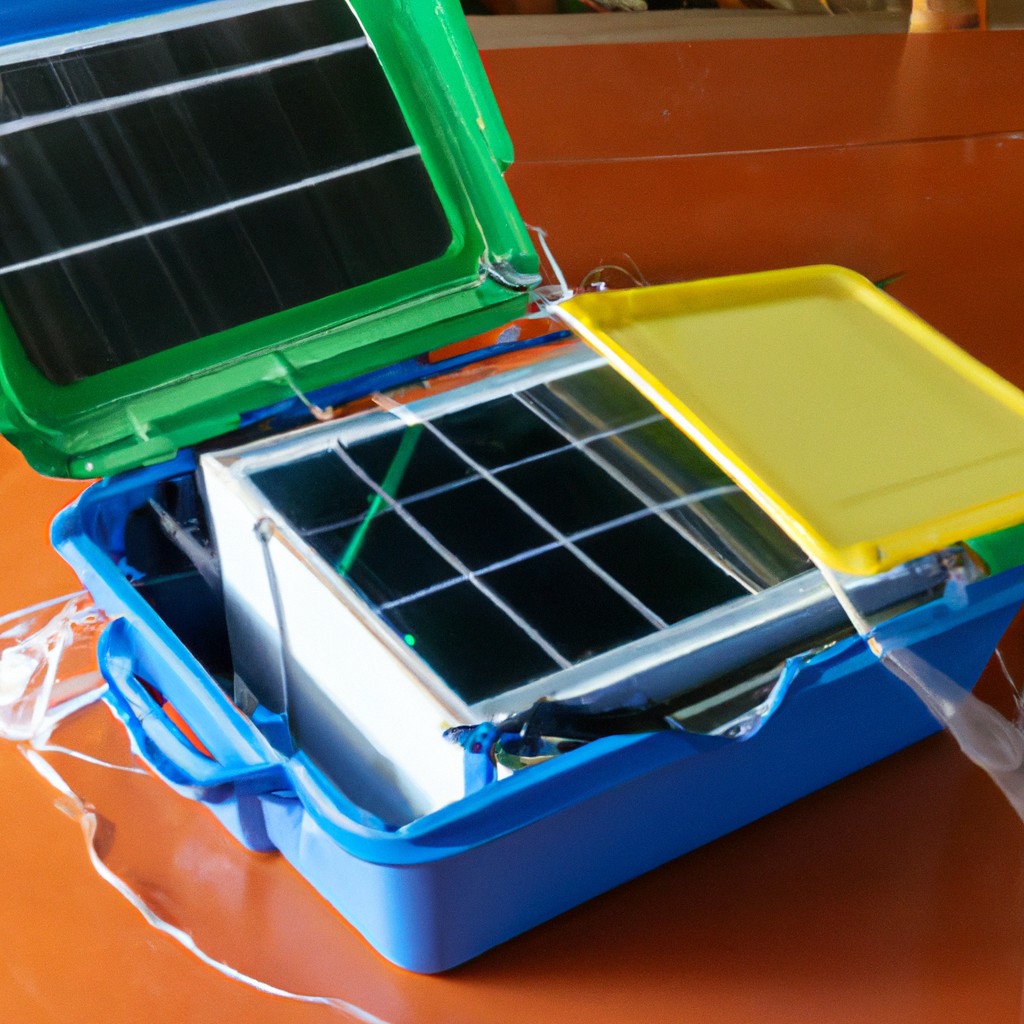
Step-by-Step Guide to Building A DIY Solar Generator
Begin by selecting a container to house your system, such as a toolbox or a custom box. Ensure it is spacious enough for all components while maintaining portability.
Install the battery first, securing it firmly in place within the container since it will be the core of your generator. Deep cycle batteries are most suitable due to their ability to handle repeated discharge and recharge cycles.
Next, attach the charge controller, which regulates the voltage from the solar panels, preventing battery damage. Follow the manufacturer’s instructions for proper wiring.
Connect the battery to the inverter, which will convert the stored DC power into AC power, making it usable for most appliances. Ensure the inverter’s capacity aligns with your energy needs.
Set up the solar panels in a location with maximum sun exposure. Mount them securely and connect them to the charge controller using appropriately rated cables.
Finally, test the system with a few small devices to ensure everything functions correctly before relying on it for significant power needs. Regular maintenance checks are essential to ensure safety and longevity.
Why Build Your Own DIY Solar Generator
Embarking on the project of assembling a homemade solar generator offers a range of benefits. Cost-effectiveness stands at the forefront; commercially available generators can be expensive, and a DIY approach allows for customization and scaling based on specific budget constraints. This cost reduction doesn’t compromise on efficiency; self-built units can rival the power output of off-the-shelf generators.
Moreover, the process of crafting a solar generator enhances practical skills and knowledge of renewable energy systems. It provides valuable, hands-on experience with solar technology, battery maintenance, and energy management, which can be advantageous for future projects or troubleshooting.
Another advantage is the adaptability of a handmade generator. It can be designed to cater to unique power requirements, from small-scale needs like charging devices to larger applications such as powering tools or even a tiny home. This tailored solution ensures that you’re not paying for unnecessary capacity or features that you don’t need.
Eco-conscious individuals will appreciate the sustainability aspect of DIY solar generators. By using the sun as a power source, you are contributing to the reduction of fossil fuel dependence and greenhouse gas emissions, further promoting environmental stewardship.
Lastly, the sense of accomplishment that comes with building a functional solar generator can’t be overstated. It fosters a deeper connection to the technology and satisfaction in self-reliance and innovation.
Also Read:
- What Size Solar Generator to Run Refrigerator and Freezer
- Solar Panel Setup: Step-by-Step Guide for Efficient Energy Installation
- How to Use Solar Panels During Power Outage: Essential Steps for Emergency Power
- How Much Solar Do I Need for My RV: Calculating Your Energy Requirements
- 12V Solar Panel Wiring Diagram: Step-by-Step Installation Guide